
| Version 50 (modified by , 8 years ago) ( diff ) |
|---|
Table of Contents
Configuring SSH Keys
SSH access to ORBIT machines requires the use of public key authentication. If you try to connect using the username and password that you use for accessing the scheduler and status pages, you will receive the following message:
Permission denied (publickey).
You need to configure the SSH client on your computer to use a private key for connecting to ORBIT machines instead of a password. Additionally, the corresponding public key needs to be added to your ORBIT account. This page describes the procedure for generating a public/private key pair, configuring your SSH client, and uploading the necessary public key to your ORBIT account. The instructions here are for specific SSH client software, if you use a different SSH client than those referenced here, please follow the documentation provided with that SSH client and use the instructions here for reference.
Select the OS of your computer
Linux
NOTE: These instructions are NOT for Ubuntu installed using Windows Susbsystem for Linux (WSL).
Generating keys
Each distribution has their own location for the specific generation tools. These instructions are based on the documentation for Ubuntu (located here).
To create your public and private SSH keys, open a command-line terminal and type:
ssh-keygen -t rsaYou will be prompted for a location to save the keys, and a passphrase for the keys which we highly recommend. This passphrase will protect your private key while it's stored on the hard drive:
Generating public/private rsa key pair.
Enter file in which to save the key (...):
Enter passphrase (empty for no passphrase):
Enter same passphrase again:
Your identification has been saved in ...
Your public key has been saved in ...
Your public key is now available as .ssh/id_rsa.pub in your home folder.
This process will generate and store a private key and a public key file. The private key will be stored in the file and location you specify when prompted, and the public key file will be named the same as your private key file but with a .pub extension.
Uploading your public key to your ORBIT account
To upload you public key to your orbit account, do the following:
- Go to https://www.orbit-lab.org/loginService/ControlPanel
- Click on "Change My Profile" option in the left side menu
- Click the "Choose File" button next to "Public key file"
- Navigate to where your public key file is stored (typically /home/your_username/.ssh)
- Select the .pub file corresponding to the key you wish to use for ORBIT access
- Click "Open"
- Click the "Update Profile" button
As a side note, expect to see a default auto generated ORBIT public key in the list (ends with @internal1). This is used for SSH access between machines inside the ORBIT network. Please do NOT delete this key.

Configuring your SSH client
To test your setup, open a command-line terminal and (while replacing your_orbit_username with your ORBIT username) type:
ssh your_orbit_username@gw.orbit-lab.orgUnder normal circumstances, as long as the private key file is located in the /home/your_username/.ssh/ folder, the command line SSH client will use the correct key when connecting.
Common issues and how to solve them
- If you receive a message like the following:
The authenticity of host 'gw.orbit-lab.org (128.6.192.134)' can't be established.
ECDSA key fingerprint is SHA256:iLKtq2Z8wB3ADJdEyM1CwoU85gOeqIUyB4GOJ2YloQg.
Are you sure you want to continue connecting (yes/no)?
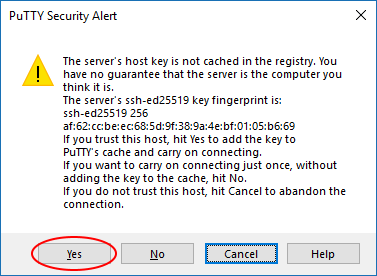
This is a normal message that occurs when your computer connects via SSH to another that it has never connected to before or if the "fingerprint" of the other machine changed (due to replacement or reconfiguration). Simply typeyesand connection will proceed normally.
- If you receive a message like the following:
Permission denied (publickey).
Try connecting again but manually specifying the location where your private SSH key is stored as in the following example:ssh -i /path_to_where_key_is_stored/private_ssh_key_name your_orbit_username@gw.orbit-lab.org
Windows
PuTTY
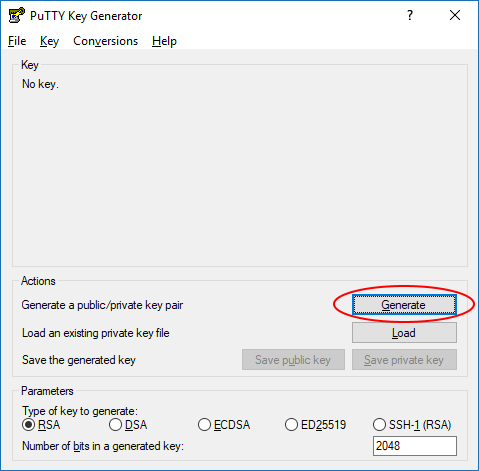
In putty the key generation is handled by a separate program named puttygen.exe. If you've installed putty via the installer there may be an icon for it in the putty menu group, otherwise download it here. Generating a public/private key pair on your host by using PuTTYgen as illustrated in the following table (for more details on configuration please csee putty documentation):
| 1. | Start PuTTYgen; The running executable windows is shown on the left. | 
|
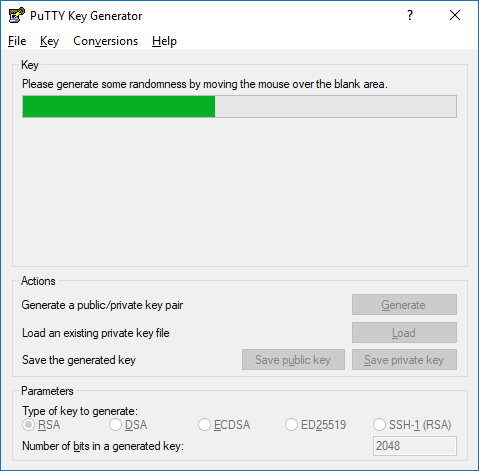
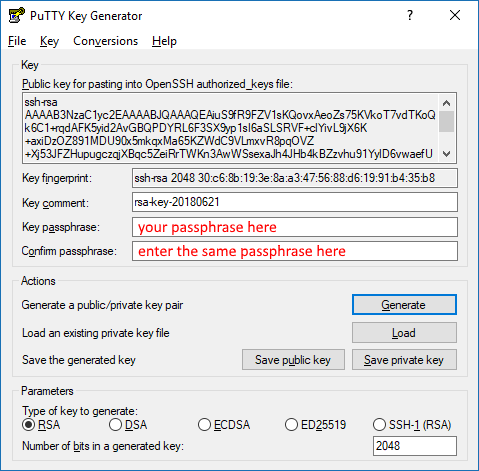
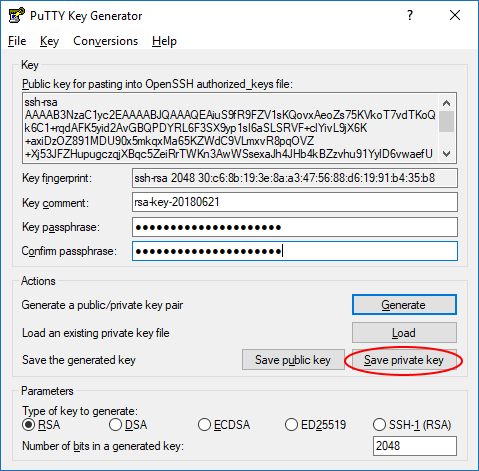
| 2. | Click the Generate button. You will be asked to move mouse to generate some randomness. After that the program will generate key and display the result. You can leave blank "Key passphrase" and "Confirm passphrase" to be able to authenticate without passphrase. Save public and private key (you can recover the public key from the private key with PuTTYgen by clicking the Load button). |
|
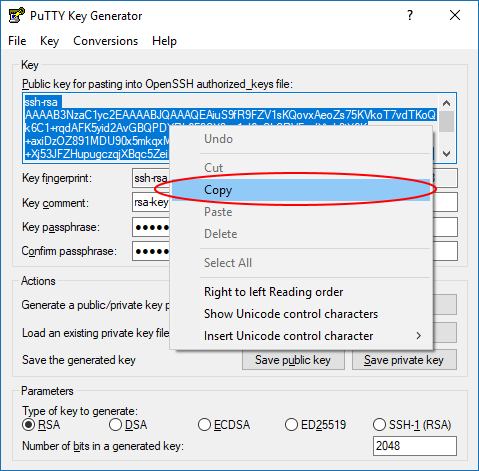
| 3. | Upload your new public key to your orbit account. | |
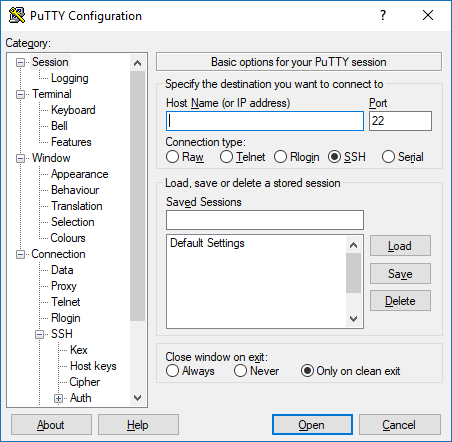
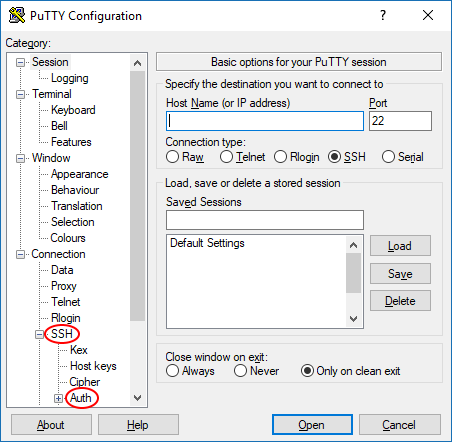
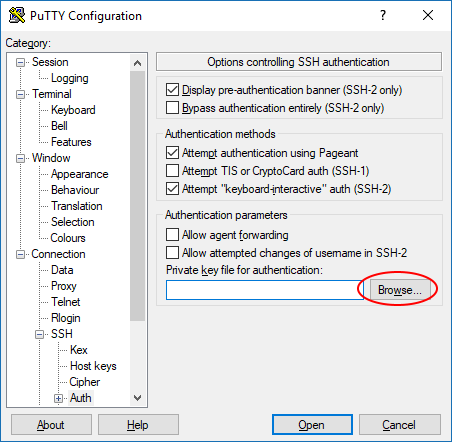
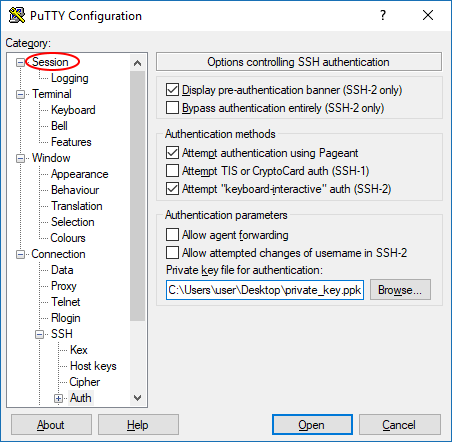
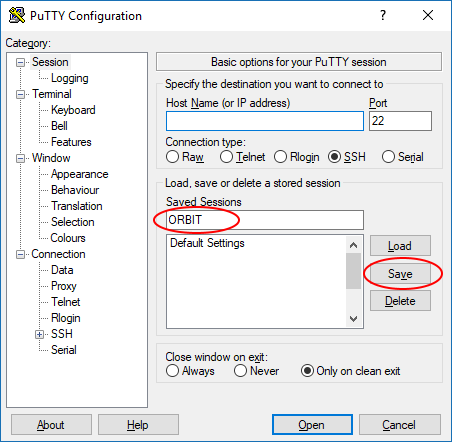
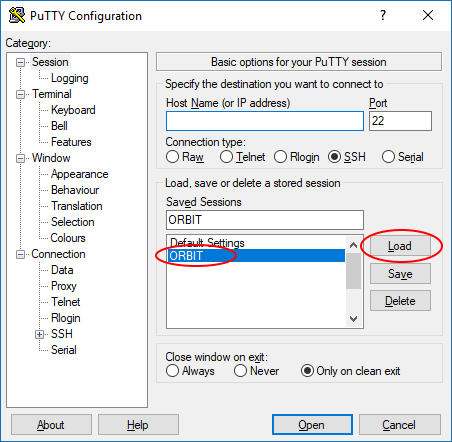
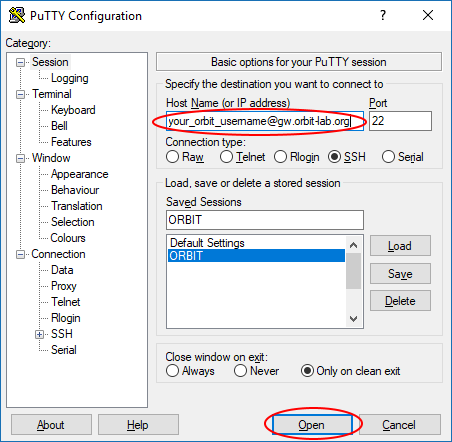
| 4. | To connect to remote host by using newly minted keys configure your session in PuTTY: Load the session profile, go to Connection > SSH > Auth window and select the newly created private key; click Save to update session profile and then proceed to connect. If you didn't specify the passphrase in step 2, you won't be prompted for the password. |
|
SSH Secure Shell
| 1. | Start the ssh client | |
| 2. | From the menu choose Edit> Settings option and then Key |
|
| 3. | Click the Generate button, click Next, select RSA type of the key and click Next and wait until key is generated |
|
| 4. | Enter file name for private key and comment. Leave passphrase blank. Click Next, Next and then save public key into file by clicking Export button and then click Finish |
|
| 5. | Upload your new public key to your orbit account. | |
| 6. | After you upload public key you can connect to host choosing Public Key option for Authentication Method. |
|
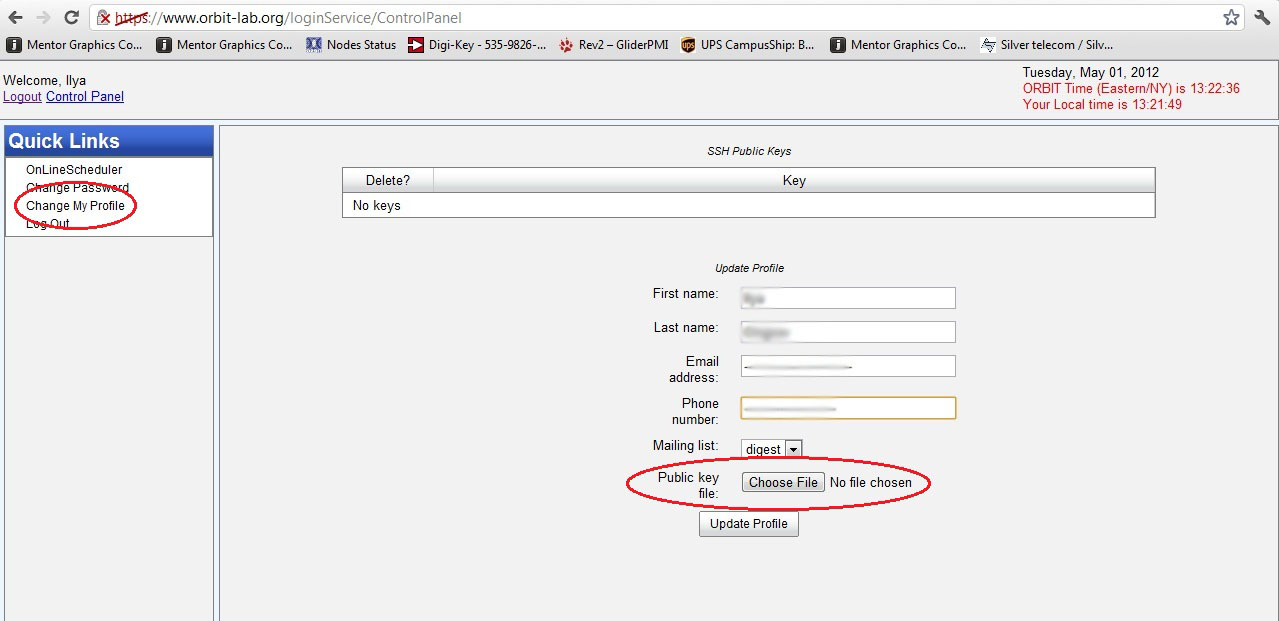
Uploading your public key to you ORBIT account
NOTE:Internet Explorer is not supported for Control Panel operations (including key upload)
To upload you public key to your orbit account, do the following:
- Go to https://www.orbit-lab.org/loginService/ControlPanel
- Click on "Change My Profile" option in the left side menu
- Click the "Choose File" button next to "Public key file"
- Navigate to where your public key file is stored (typically /home/your_username/.ssh)
- Select the .pub file corresponding to the key you wish to use for ORBIT access
- Click "Open"
- Click the "Update Profile" button
As a side note, expect to see a default auto generated ORBIT public key in the list (ends with @internal1). This is used for SSH access between machines inside the ORBIT network. Please do NOT delete this key.
Mac
TODO
Attachments (15)
- ControlPanel.jpg (108.5 KB ) - added by 13 years ago.
- puttygen01.png (11.8 KB ) - added by 8 years ago.
- puttygen02.png (11.0 KB ) - added by 8 years ago.
- puttygen03.png (25.2 KB ) - added by 8 years ago.
- puttygen04.png (22.6 KB ) - added by 8 years ago.
- puttygen05.png (24.1 KB ) - added by 8 years ago.
- puttygen06.png (23.4 KB ) - added by 8 years ago.
- putty01.png (19.3 KB ) - added by 8 years ago.
- putty02.png (20.3 KB ) - added by 8 years ago.
- putty03.png (20.8 KB ) - added by 8 years ago.
- putty04.png (21.0 KB ) - added by 8 years ago.
- putty05.png (19.4 KB ) - added by 8 years ago.
- putty06.png (19.5 KB ) - added by 8 years ago.
- putty07.png (21.1 KB ) - added by 8 years ago.
- putty_alert.png (10.7 KB ) - added by 8 years ago.
Download all attachments as: .zip