
| Version 30 (modified by , 3 years ago) ( diff ) |
|---|
Table of Contents
Tutorial: OpenStack Setup
Requirements:
- Setup/Practice of Orbit Nodes.
- Any available Orbit Sandbox Node
- Ubuntu 20.04.5 LTS or Ubuntu 22.04.2 LTS (Choice is up to you)
In this tutorial, we will be using one of the sb9 nodes for setting up OpenStack. However, sb(1-10) should also be capable for OpenStack setup.
Make sure you have Ubuntu 20.04.5 (baseline20.04.ndz) or 22.04.2 (ubuntu2204-beta.ndz) LTS. To get the Ubuntu Version, follow these steps after ssh'ing into your console. Substitute for the image and node you want.
The below steps illustrate loading Ubuntu 20.04.5 LTS for node1-2 of sb9. On your sb9 console,
username@console:~$ omf tell -t node1-2 -a offh
username@console:~$ omf load -t node1-2 -i baseline20.04.ndz
username@console:~$ omf tell -t node1-2 -a on
To verify if you have loaded your Ubuntu version properly, use this command after ssh into the node1-2
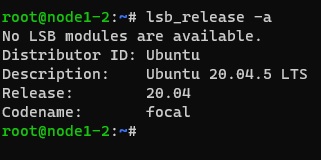
root@node1-2:~# lsb_release -a
This will list the current version of Ubuntu loaded.
Example Image:

Set up an OpenStack development environment via DevStack
After loading your version of Ubuntu, you can follow below steps to install OpenStack
- Update and Upgrade Packages:
root@node1-2:~# sudo apt-get update && sudo apt-get upgrade -y - Install Git:
root@node1-2:~# sudo apt-get install git
- Clone the DevStack Repository:
root@node1-2:~# git clone https://github.com/openstack/devstack.git
- Create a Stack User:
root@node1-2:~# sudo ./devstack/tools/create-stack-user.sh
- Switch to the Stack User:
root@node1-2:~# sudo su stack
stack@node1-2:/root$ cd ~ - Clone the DevStack Repository (as the Stack User):
stack@node1-2:~$ git clone https://git.openstack.org/openstack-dev/devstack
- Remove the Existing Python 3 Pip Package (if present) and Download and Install the Latest Python 3 Pip Package:
stack@node1-2:~$ sudo apt remove python3-pip
stack@node1-2:~$ wget https://bootstrap.pypa.io/get-pip.py
stack@node1-2:~$ sudo python3 get-pip.py
- Install a Specific Version of the Cryptography Package(there is version conflict with the OpenSSL package automatically installed by dev stack, install the below version to prevent this issue):
stack@node1-2:~$ pip install cryptography==38.0.4
- Copy the local.conf into the devstack folder:
stack@node1-2:~$ cd devstack/samples/local.conf devstackstack@node1-2:~$ cd devstack - Identify Node's IP Address; configure and setup local.conf in Devstack folder according to requirement (either the controller or compute node):
stack@node1-2:~/devstack$ hostname -I
Example Image:
stack@node1-2:~/devstack$ cd
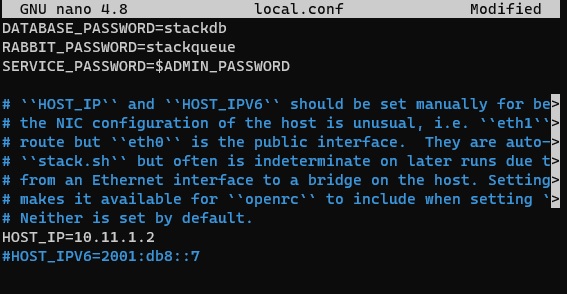
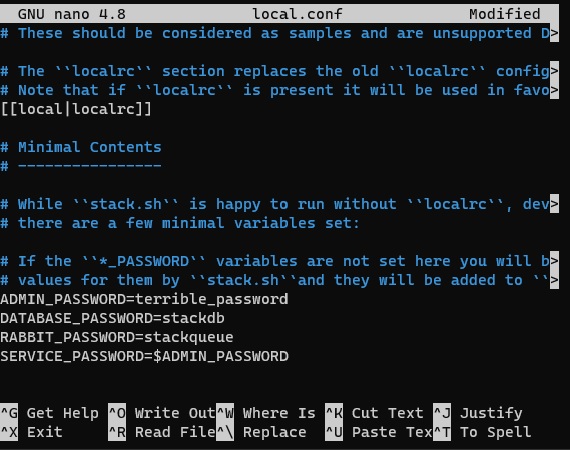
stack@node1-2:~/devstack$ nano local.conf
Scroll to the ADMIN_PASSWORD, and change the password to what you prefer. Afterwards, scroll to HOST_IP. Remove the comment in front of the HOST_IP to the IP of the current node(so here in this case 10.19.1.2) and
- Fireup the Stack:
FORCE=yes ./stack.sh
For more details related to installation process: https://docs.openstack.org/watcher/newton/dev/devstack.html
This will take around 15-20 minutes. In this process, you might be asked to set up passwords for Horizon, MYSQL, etc. Once installation is done, it provides information related to Horizon, Keystone which will look something like this.
This is your host IP address: 10.19.1.2
This is your host IPv6 address: ::1
Horizon is now available at http://10.19.1.2/dashboard
Keystone is serving at http://10.19.1.2/identity/
The default users are: admin and demo The password: *(Password set by you during installation process)
You can log in to view the Horizon dashboard(http://10.19.1.2/dashboard) using below default credentials
Attachments (6)
- lsb_release.jpg (19.6 KB ) - added by 3 years ago.
- hostname-I.jpg (10.5 KB ) - added by 3 years ago.
- ipaddress.jpg (67.9 KB ) - added by 3 years ago.
- badpassword.jpg (91.4 KB ) - added by 3 years ago.
- goodies.jpg (72.2 KB ) - added by 3 years ago.
- runcommand.jpg (72.1 KB ) - added by 3 years ago.
Download all attachments as: .zip