
| Version 52 (modified by , 3 years ago) ( diff ) |
|---|
Distributed Data Infrastructure
Project Advisor: Professor Alexei Kotelnikov
Team Members: Keshav Subramaniyam, Jason Zhiyuan Zhang, Samyak Agarwal, Anna Kotelnikov, Gyana Deepika Dasara
Objective Of This Project
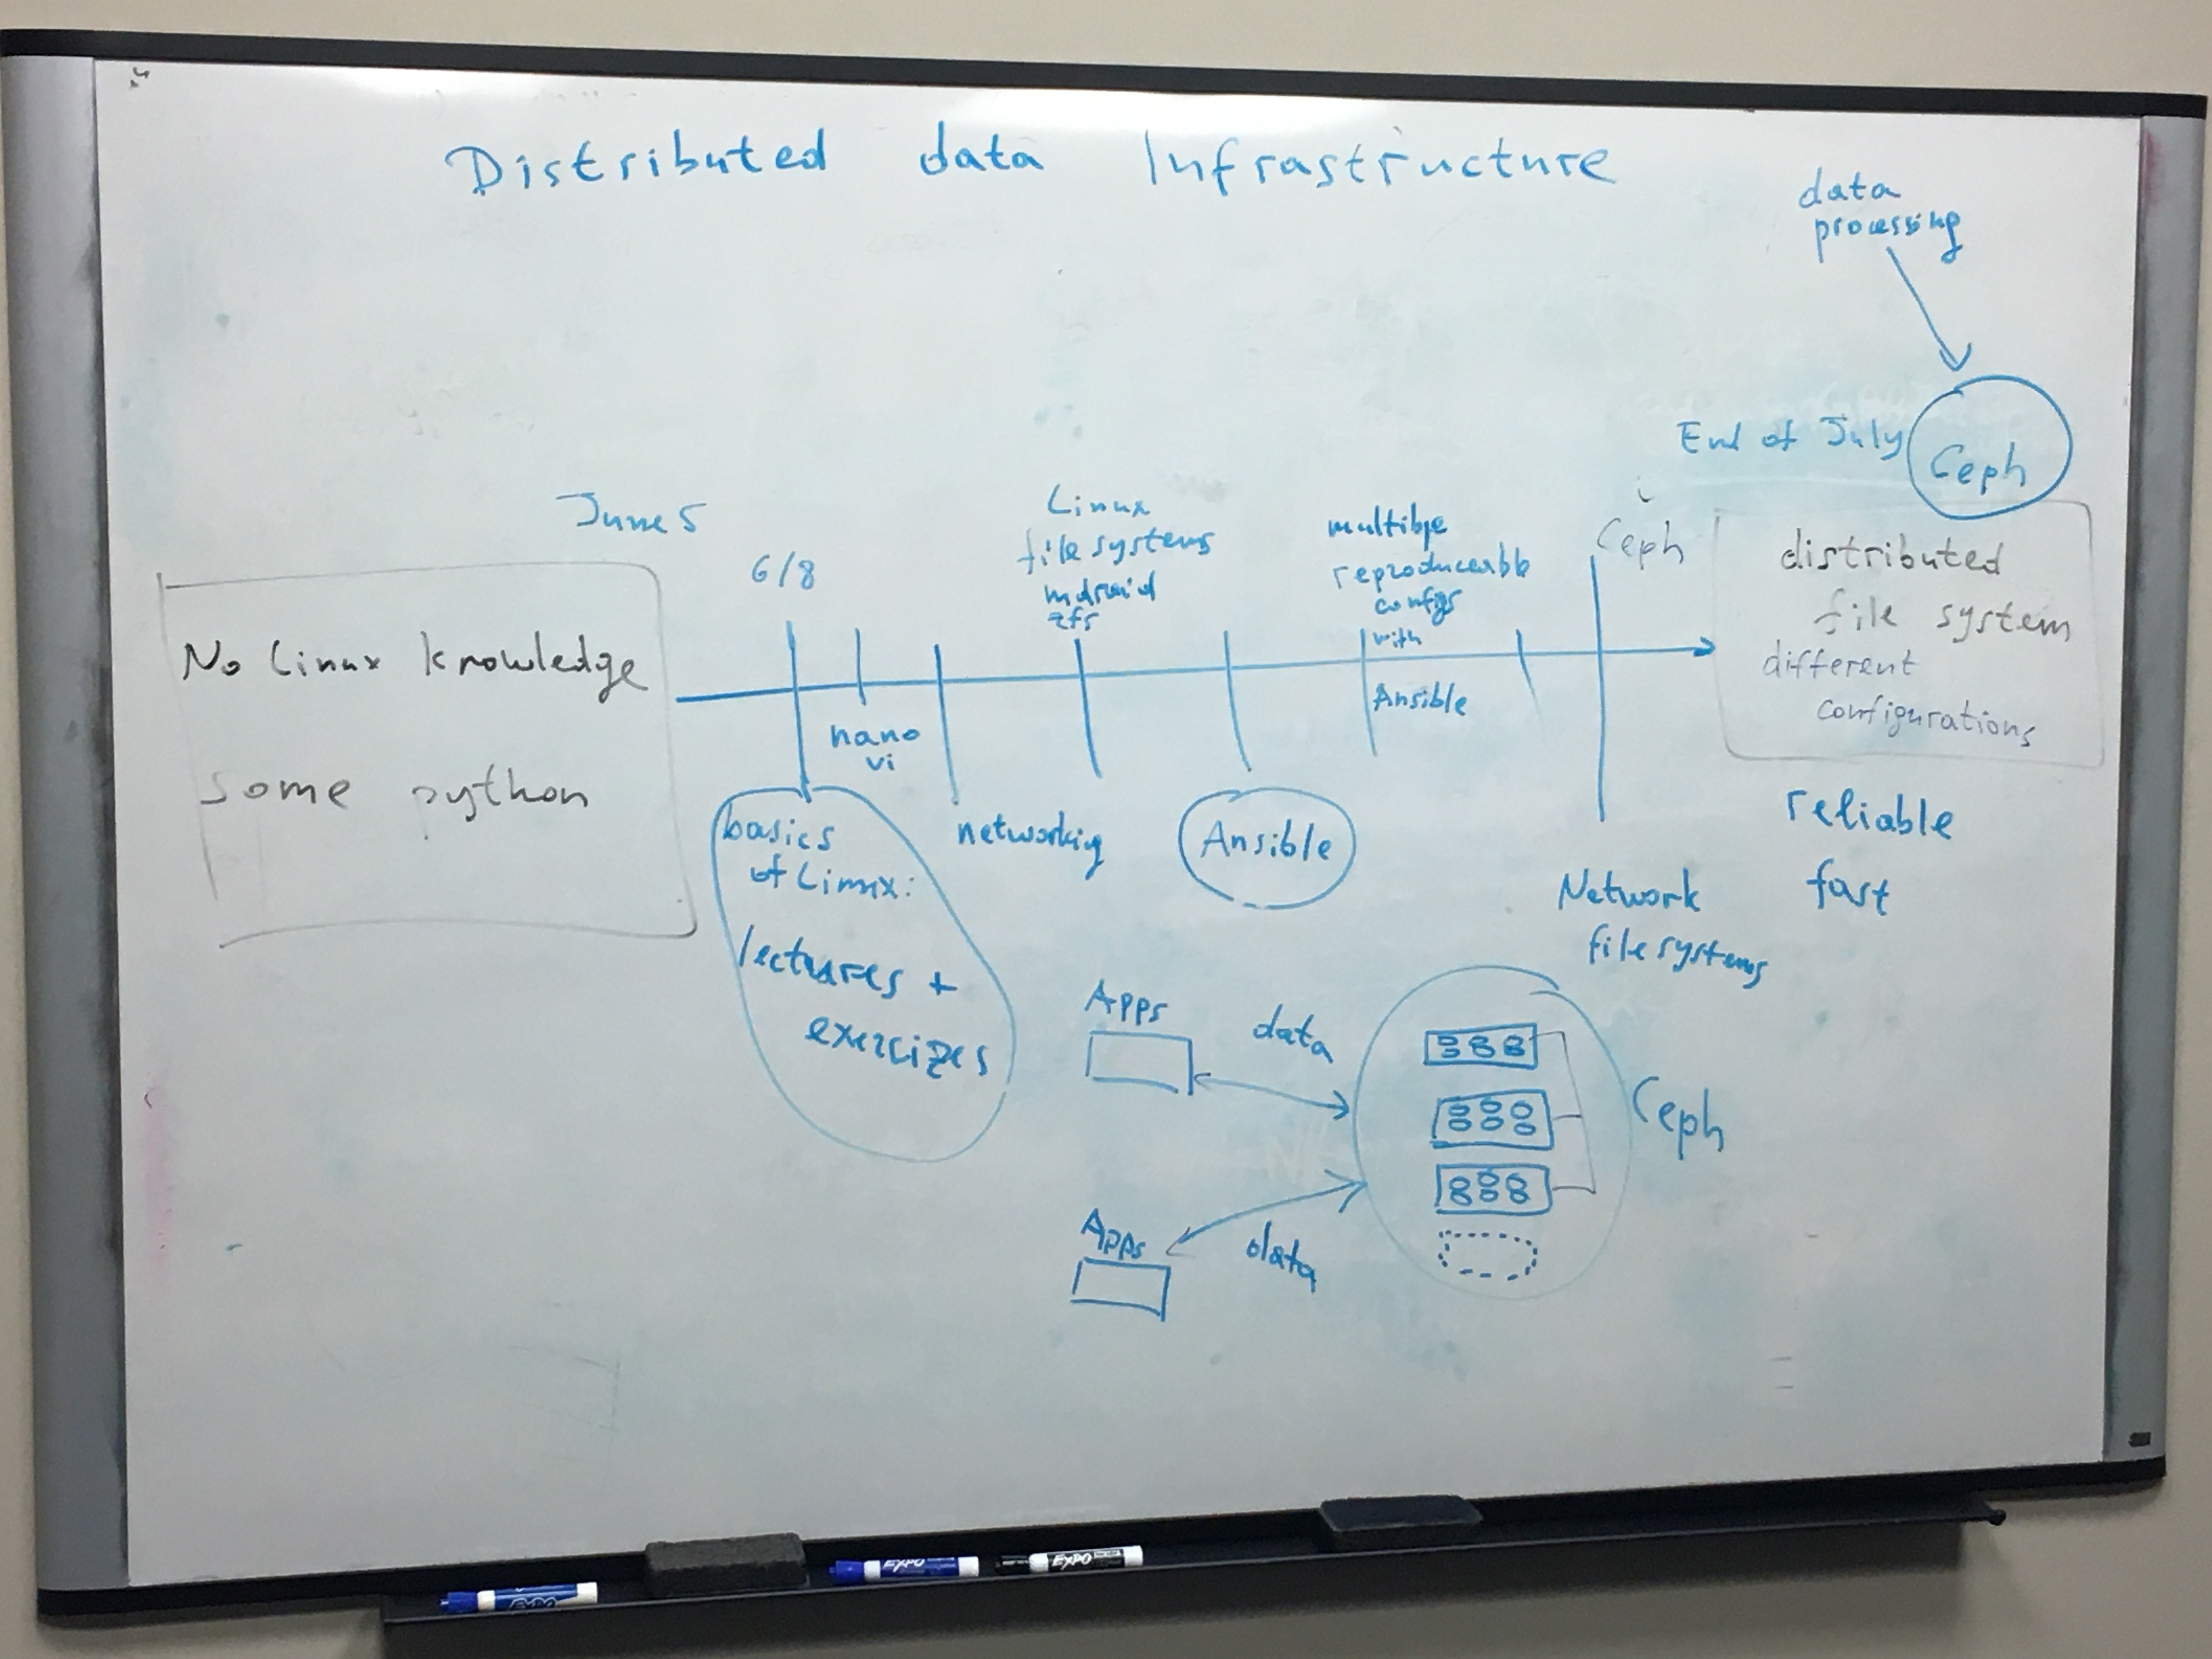
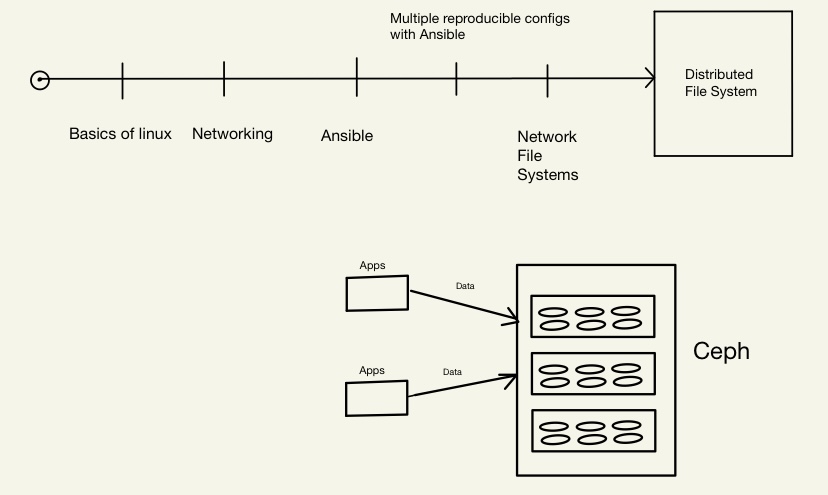
The objective of the project "Distributed Data Infrastructure focuses in general on developing a Ceph file system as well as stress testing the system's robustness and resilience. In order for us to be able to accomplish this goal, we are learning multiple concepts such as the Linux operating systems, file systems, networking, as well as Ansible.

Week 1
Summary
- Understood the goal of the project.
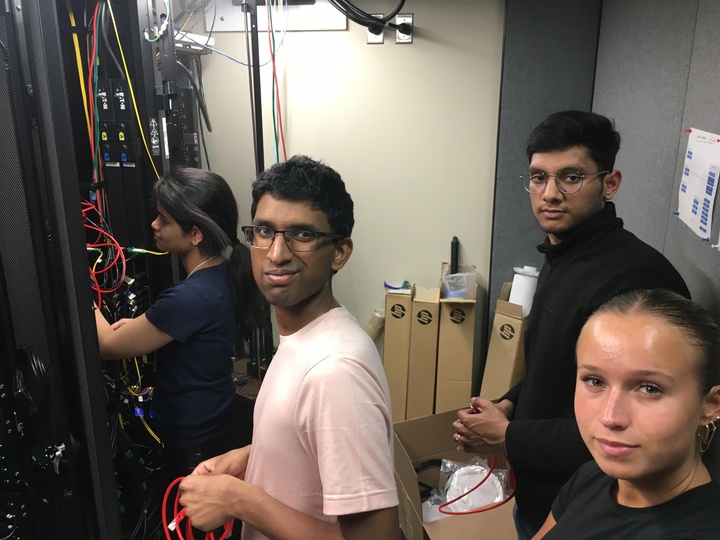
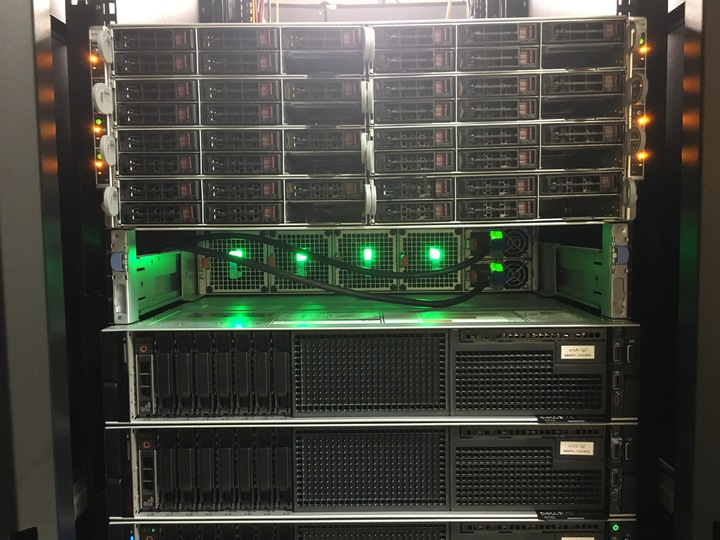
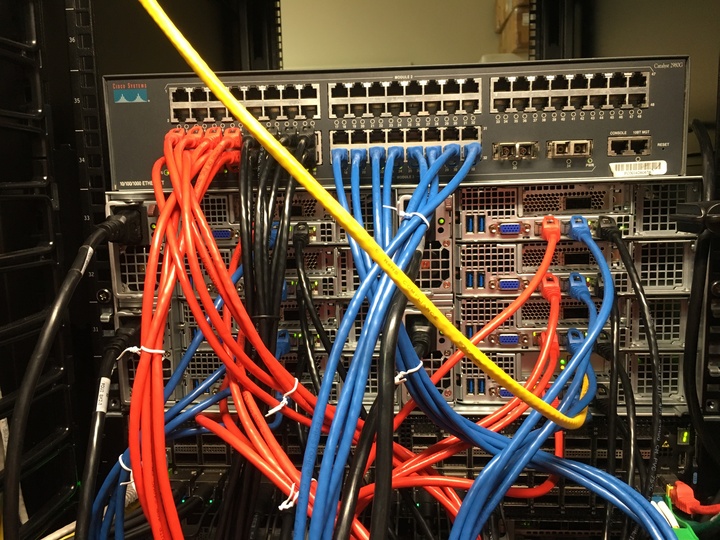
- Installed packages and wired a cluster of 8 servers.
- Got familiar with Linux by practicing some simple Linux commands.
Idea Of Our Progress This Week
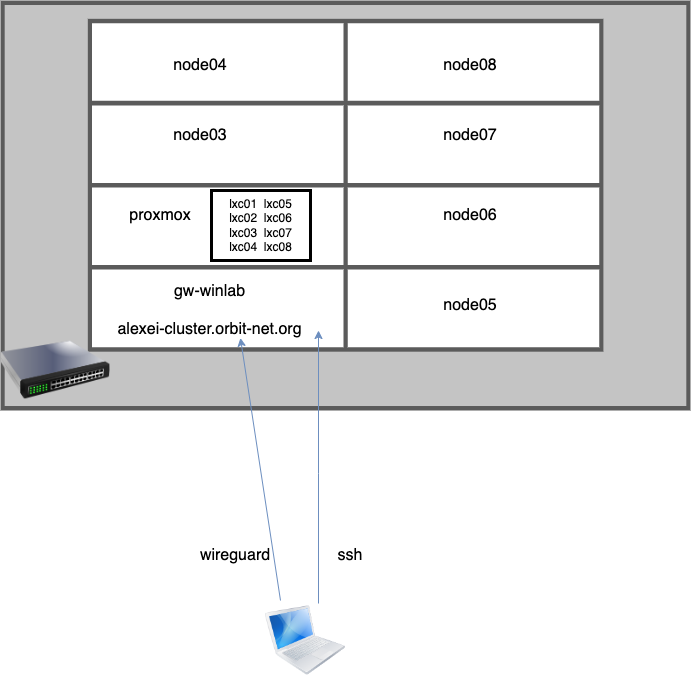
Our main goal for this week was to spend time understanding the goal of the project and installing the necessary tools that would be used throughout the project, such as SSH, Orbit, Linux Packages, and eight cluster servers. We also got access to our Wireguard where we would be getting access to containers. We also installed and wired a cluster of 8 servers and issued some commands from our LXC containers in our terminal where we worked with Linux.

We then understood some of the basic commands that would be useful for some more advanced work in the project. The final thing that we did was to install Debian and Ubuntu packages, removing Ubuntu packages with APT, and also searched and queried Ubuntu packages with APT.

Project Resources
Linux Exercises: https://linuxcourse.rutgers.edu/Winlab_Internship_2023/html/linux_commands.html
Linux Package Installation: https://linuxcourse.rutgers.edu/Winlab_Internship_2023/html/debian_packaging.html
Week 2
Summary
- Installed Debian Linux in Hard Drives
- Solidified our understanding of networking as well as the Network File Systems (NFS).
- Worked with start and stop services as well as job schedulers.
How Our Cluster Should Look Like

Idea Of Our Progress This Week
This week, we spent more time installing more drives to work with throughout the project. To understand the interaction that these drives would go through, we spent time studying one of the most fundamental file systems that are useful for this project, known as the network file system, which is basically a method for sharing files where "files reside on one or more remote servers accessible on a local client system", according to the course that we followed for this project. We mounted NFS and also booted up the BIOS which would prove useful for this project.
SSD Drive Anatomy
Week Resources
Debian Networking: https://linuxcourse.rutgers.edu/Winlab_Internship_2023/html/debian_networking.html
Network File Systems (NFS): https://linuxcourse.rutgers.edu/Winlab_Internship_2023/html/NFS.html
Start And Stop Services: https://linuxcourse.rutgers.edu/Winlab_Internship_2023/html/systemd.html
Article On Network File Systems (NFS): https://www.weka.io/learn/file-storage/what-is-network-file-system/
Week 3
Summary
- Went over Shell Scripting and Python Scripting
- Worked With Distributed File Systems
- Performance Testing for ZFS and also MDRAID
Idea Of Our Progress This Week
This week we were introduced to the idea of shell scripting as well as Python scripting and worked on some exercises in general. We also did the manual work of replacing the old network switch in the cluster with the new, 1 Gbit 48 port switch and also configured 2 vlans on the switch. After installing the Samsung drives, we noticed that new devices were added along with /dev/sda, /dev/sdb, /dev/sdc, /dev/sdd. After that, we spent some time reading more articles about HPC Storage and about how that generally works. We then learnt about some of the most fundamental file systems that are useful for this project including ZFS, MDADM, as well as RAID.
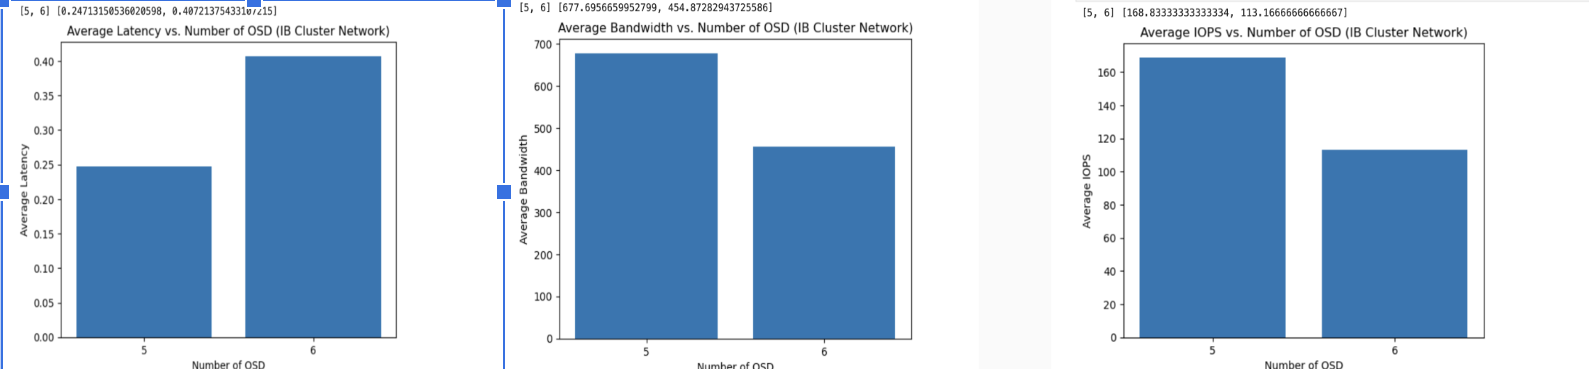
The RAID (redundant array of independent disks) is a way of storing the same data in different places on multiple hard disks, while the MDADM is a Linux utility used to create, manage, as well as monitor software-based RAID devices. We used the concepts that we then learnt in order to test MDRAID as well as ZFS for disk failure. We did the following: exported /scratch file system (RAID 5) which is built on 3 drives from the nodes to our LXC containers, mounting it there in general. We then checked the I/O performance on /scratch on the file server, and the node, and we finally checked the I/O performance of the NFS mounted file system. Here are some diagrams with some of the statistics of the comparison between local vs remote performance as well as normal versus degraded performance.
.jpg)
.jpg)
We used the DD command to do the I/O scripting. After that, we captured an installation image on FOG after Debian 12 was installed in node03, and we learnt about the GRUB software for recovery purposes.
Week Resources
Shell Scripting: https://linuxcourse.rutgers.edu/Winlab_Internship_2023/html/shell_scripting.html
Python Scripting: https://linuxcourse.rutgers.edu/Winlab_Internship_2023/html/python_scripting.html
MDADM/ZFS Raid Configurations: https://linuxcourse.rutgers.edu/Winlab_Internship_2023/html/Raid_configurations.html
Week 4 + Week 5
Summary
- Focused on Ceph installation
- Did some troubleshooting relating to OSDs
- Ran I/O dd and fio scripts using Ceph
- Installed Debian 11.7
Idea Of Our Progress This Week
This was probably the week where we did the most chunk of work that was relevant to the project, which was getting into the process of Ceph installation as well as working with Ceph. We watched three videos about how Ceph works, data security, as well as the process of self-balancing and also self-healing. While we were trying to mount Ceph, there was a lack of OSDs and we spent Week 4 trying to troubleshoot the problem. After spending a long time with troubleshooting, we found out that we actually had an older version of Ceph installed. To fix this, we needed to change the uid, gid, as well as the group container too. After that, we installed the Debian 11 and did the Ceph installation through that.
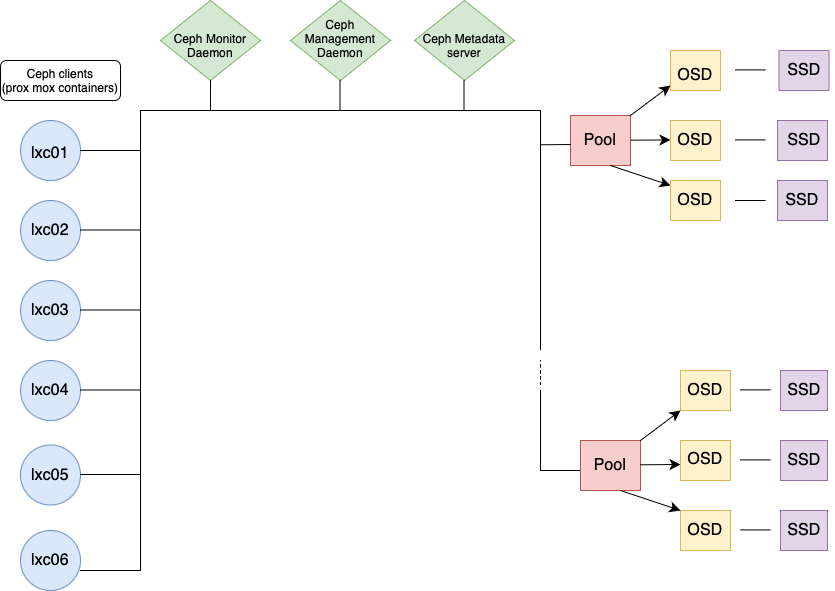
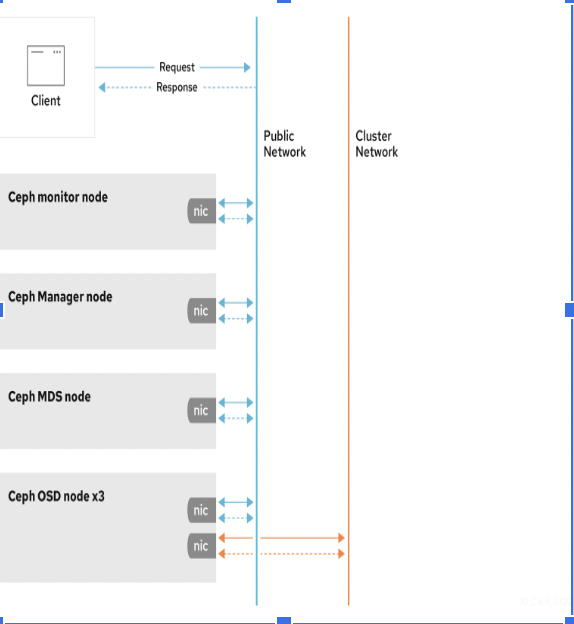
Here is how the Ceph diagram works:
- Data arrives to the file system/pool
- Splits into chunks (pool groups)
- Metadata and replicas are created and then stored into OSDs.

Week Resources
- Ceph Installation On One Node: https://linuxcourse.rutgers.edu/Winlab_Internship_2023/html/Ceph_one_node.html
- Building Ceph: https://docs.ceph.com/en/quincy/install/build-ceph/
- How Ceph Works: https://www.youtube.com/watch?v=HJivYTJ9Y54
- Data Security: https://www.youtube.com/watch?v=HJivYTJ9Y54
- Self Balancing and Self Healing: https://www.youtube.com/watch?v=jBWVcJYNjeA&t=8s
Week 6
Summary
- Ceph one node manual installation
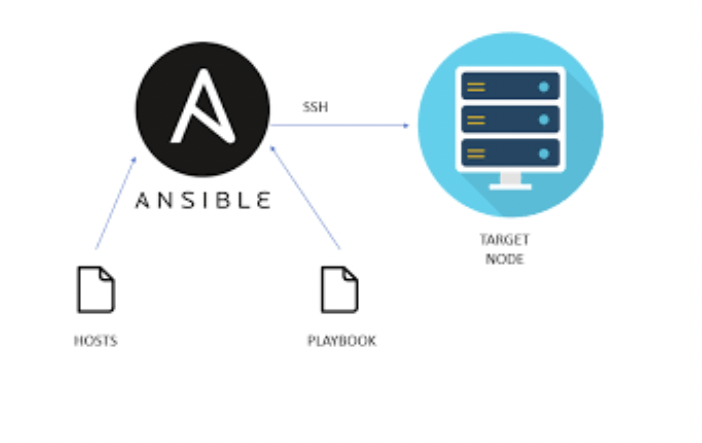
- Created lxc ansible containers
- Worked with Ansible playbooks
Idea Of Our Progress This Week
Here is how the Ceph diagram works:
- Data arrives to the file system/pool
- Splits into chunks (pool groups)
- Metadata and replicas are created and then stored into OSDs.
Week Resources
- Ceph Installation On One Node: https://linuxcourse.rutgers.edu/Winlab_Internship_2023/html/Ceph_one_node.html
- Building Ceph: https://docs.ceph.com/en/quincy/install/build-ceph/
- How Ceph Works: https://www.youtube.com/watch?v=HJivYTJ9Y54
- Data Security: https://www.youtube.com/watch?v=HJivYTJ9Y54
- Self Balancing and Self Healing: https://www.youtube.com/watch?v=jBWVcJYNjeA&t=8s
Presentation Links
- Week 1 (June 05 - June 09): https://docs.google.com/presentation/d/1-KpBGlFWiV0LEJFXrU6Nk_VxNchvado48oIbh6KHOdk/edit#slide=id.p
- Week 2 (June 12 - June 16): https://docs.google.com/presentation/d/1Pujv2HFNYLHuhLFh_0tSRZg4yv6gs8nNNyNNcMXD8s8/edit#slide=id.p
- Week 3 (June 19 - June 23): https://docs.google.com/presentation/d/1uBwrVGlGCIyD_Ex1miklX3PFOZ2JsUqF-Jm7kR1JiSY/edit#slide=id.p
- Week 4 (June 26 - June 30): https://docs.google.com/presentation/d/1VeIosZZ-GPm8SnB294C6rbX2b-hYHRSArvzhm4MPiY4/edit#slide=id.p
- Week 5 (July 3 - July 7): https://docs.google.com/presentation/d/1-GlYdTUVjstotg2bEqquZz5WvsGXw3R0301GuNqOkq0/edit#slide=id.p
- Week 6 (July 10 - July 14): https://docs.google.com/presentation/d/1-GlYdTUVjstotg2bEqquZz5WvsGXw3R0301GuNqOkq0/edit#slide=id.p
- Week 7 (July 17 - July 21):
- Week 8 (July 24 - July 28): [Slides]
- Week 9 (July 31 - August 4): [Slides]
- Week 10 (August 7 - August 11): [Slides]
- Open House: [Slides]
Attachments (19)
- TT_tree_mobile.jpeg (14.5 KB ) - added by 3 years ago.
- June5.jpg (1.4 MB ) - added by 3 years ago.
- June6_1.jpg (124.3 KB ) - added by 3 years ago.
- June6.jpg (126.2 KB ) - added by 3 years ago.
- June6_2.jpg (201.3 KB ) - added by 3 years ago.
- June6_2.2.jpg (201.3 KB ) - added by 3 years ago.
- cluster.jpg (43.6 KB ) - added by 3 years ago.
- WINLAB presentation week 6_19 (1).jpg (53.9 KB ) - added by 3 years ago.
- WINLAB presentation week 6_19 (2).jpg (53.9 KB ) - added by 3 years ago.
- Ceph diagram.png (105.0 KB ) - added by 3 years ago.
- IMG_6645.jpg (46.8 KB ) - added by 3 years ago.
- Screen Shot 2023-08-07 at 2.34.32 PM.png (141.5 KB ) - added by 3 years ago.
- Screen Shot 2023-08-07 at 2.52.50 PM.png (482.1 KB ) - added by 3 years ago.
- Screen Shot 2023-08-07 at 2.54.45 PM.png (74.2 KB ) - added by 3 years ago.
- Ceph.png (130.2 KB ) - added by 3 years ago.
- PerformanceTestingGraphs.png (74.2 KB ) - added by 3 years ago.
- Ansible-Playbook.png (141.5 KB ) - added by 3 years ago.
- SLURM.png (482.1 KB ) - added by 3 years ago.
- PerformanceTestingGraphs.2.png (74.2 KB ) - added by 3 years ago.
.jpg)
.jpg)