
| Version 56 (modified by , 13 years ago) ( diff ) |
|---|
How to get started
First, you need an account. Please check the UsagePolicy if you are eligible. In order to get an account please register here.
A typical experiment requires the following three steps:
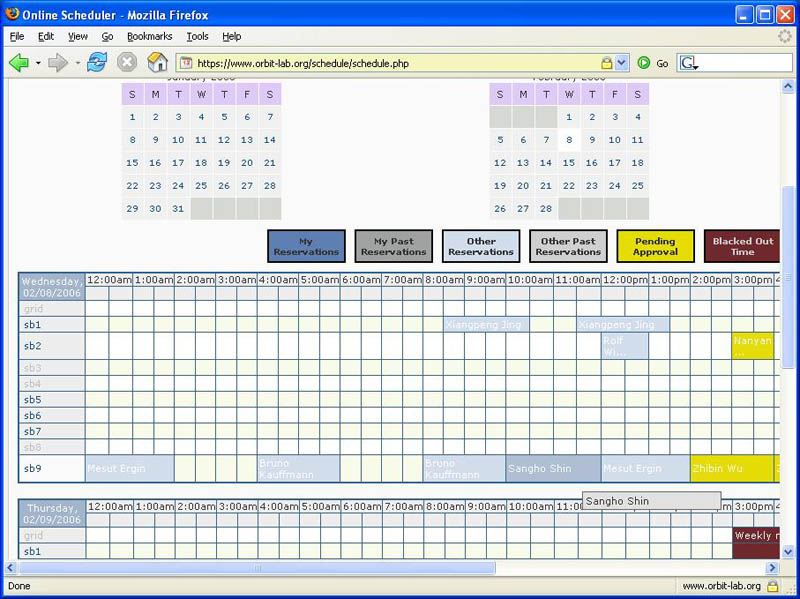
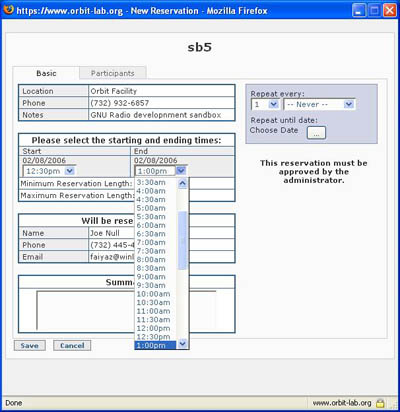
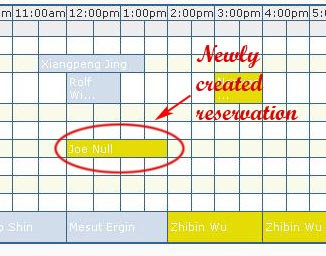
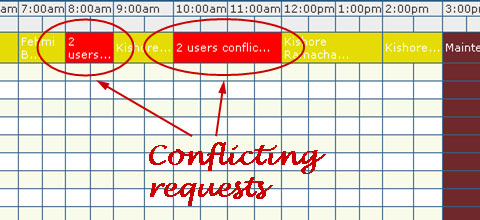
- Reservation
- Running the experiment
- Analyzing the results
Running the Experiment
During your approved time slot, you will be able to ssh into the console of the respective grid. A console is a dedicated machine that allows access to all resources on that grid.
During your approved time slot, you can then log into the console corresponding to the following table using SSH:
| Name | Nodes | Console FQDN | Special Resources |
| Main grid | 400 | console.grid.orbit-lab.org | USRP2, USRP1, Blue too, Zigbee, etc… |
| Sandbox 1 | 2 | console.sb1.orbit-lab.org | None |
| Sandbox 2 | 2 | console.sb2.orbit-lab.org | None |
| Sandbox 3 | 2 | console.sb3.orbit-lab.org | USRP2 |
| Sandbox 4 | 9 | console.sb4.orbit-lab.org | RF isolated nodes + mixer |
| Sandbox 5 | 2 | console.sb5.orbit-lab.org | USRP1 |
| Sandbox 6 | 2 | console.sb6.orbit-lab.org | WinC2R |
| Sandbox 7 | 2 | console.sb7.orbit-lab.org | None |
| Sandbox 8 | 2 | console.sb8.orbit-lab.org | None |
| Sandbox 9 | 11 | console.sb9.orbit-lab.org | Netfpga + Openflow |
For example, to access the sandbox1,
yourhost>ssh username@console.sb1.orbit-lab.org
When you have successfully logged in, you can start an experiment using the Orbit Management Framework (OMF). First time users are highly encouraged to reserve time on a sandbox instead of the main grid, and start with the built-in Hello World experiment.
- Before we begin using the nodes, it's a good idea to check their status first. This is done with the omf stat command. This will typically produce a result like:
Individual nodes are identified by their fully qualified domain name (FQDN). This establishes their "coordinates" and the "domain" to which they belong. Nodes in different domains can NOT see each other.
- The node can be in 1 of 3 states:
POWEROFF Node is Available for use but turned off POWERON Node is Available and is on NODE NOT AVAILABLE Node is not Available for use
- It is recommended that the node be in the POWEROFF state prior to any experiment process. If the node is in the POWERON state you can use the omf tell command
to get the node into the off state.
username@console.sb1:~$ omf tell -a offh -t TOPOLOGY
The TOPOLOGY can take on many forms, the simplest being a comma separated list of FQDN's. There are special predefined topologies like: all, system:topo:circle, … For more details see OMF documentation If the node is in the NODE NOT AVAILABLE state, you may need to wait for it to recover the POWEROFF state (it some times requires a few moments for the service to sync up). If the node never comes out of the NODE NOT AVAILABLE state please contact an administrator.
- Prior to the experiment, users need to install an image on the hard disks of the nodes. If you have not created a custom image use the default starting image: baseline.ndz. This image is built on top of ubuntu 12.04, and is pre-configured with the proper modules and start up scripts to take advantage of the rest of the Orbit services. Loading an image is done with the omf load command
username@console.sb1:~$ omf load -t TOPOLOGY -i IMAGENAME
Where TOPOLOGY is the set of nodes you wish to image , and !IMAGENAME is the name of the image you with to load. The most common sandbox starting image command would look likeusername@console.sb1:~$ omf load -t all -i baseline.ndz
which will load all the nodes of sandbox 1 (totaling 1) with the baseline image. - The process start should look like:
- A key line to look for is INFO whenAll: *: 'status[@value='UP']' fires. This line indicates that all the nodes have come up and imaging has begun:
- The final result should look like:
- At this point the nodes are imaged with the basline image and need to be turned back on before proceeding.
username@console.sb2:~$ omf-5.2 tell on all
Give the nodes a couple of minutes to turn on. To check the status of the node:username@console.sb2:~$ omf-5.2 stat
- By default the driver modules for the wireless interfaces are disabled. It is up to the experimenter to decide which interface to use. For this tutorial experiment the ath_pci module will be used. So before running the tutorial experiment ssh into each node (ie. node1-1 & node 1-2) and load the driver modules.
username@console.sb2:~$ ssh root@node1-1
From the node load the driver module:root@node1-1:~# modprobe ath_pci
Verify that the module has been loaded into the kernelroot@node1-1:~# lsmod
Now ssh into node1-2 and do the same.
- To run a tutorial experiment that involves one UDP traffic sender and one receiver, run the following command at the console.
username@console.sb2:~$ omf-5.2 exec --tutorial -- --tutorialName tutorial-1a
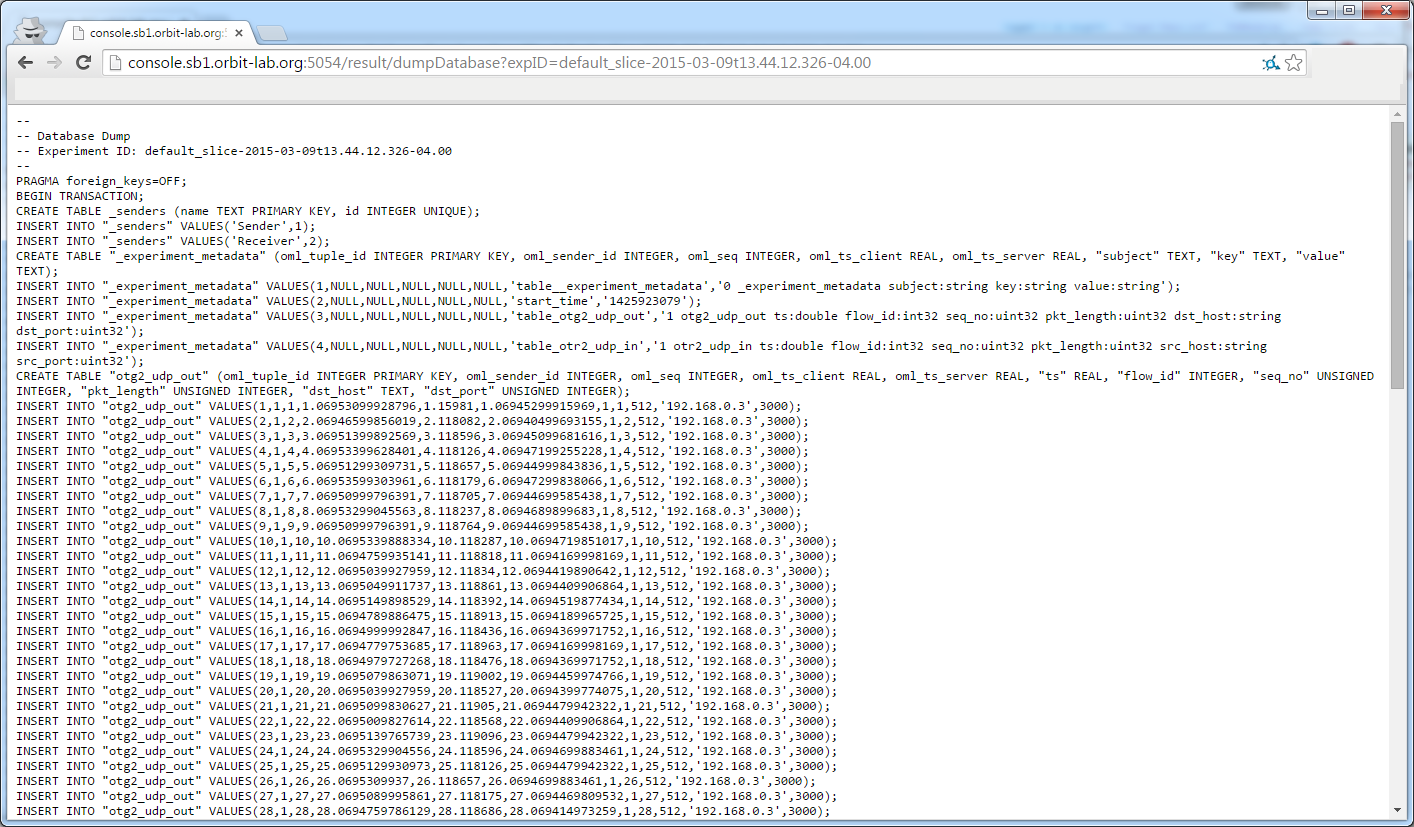
Make note of the unique experiment ID as shown in the experiment output below. This ID can be used later to view the results from a database (sqlite3) file.
- Both, sender and receiver, report measurements to a database, using the OML measurement framework. The file is saved as a sqlite3 file; the file name for the experiment is shown in the last line of the tutorial's output and saved in the console under /var/lib/oml2
To dump the database file for this experiment:
username@console.sb2:~$ sqlite3 /var/lib/oml2/sb8.orbit-lab.org_2011_07_12_16_00_33.sq3 ".dump"
The experiment can be started with:
user#> nodehandler -t

- This experiment will send UDP datagrams of 1024 bytes from node 1-1 to node 1-2 at 300 kbps CBR traffic.
- Both, sender and receiver, report measurements to a database, using our OML measurement framework.
- As shown below, the experiment controller will power on the nodes involved in the experiment and will issue experiment commands to each node.
- Each experiment has a unique experiment ID as shown in the figure, that can be used later to view the results from the database
Alternatively, a specific script can be run as follows:
The experiment can be started with:
user#> nodehandler <full-path/script-name>
For e.g., if my script is called orbit-test.rb and it resides in /home/joenull/Ruby-Scripts/ (ORBIT home directory), I would execute it as follows:
user#>pwd
/home/joenull
user#>nodehandler ~/Ruby-Scripts/orbit-test
Note that I leave out the ".rb" at the end. This will execute the scripts and turn the nodes OFF at the end of the experiment. If you want to leave them ON after the experiment, use the "-k" flag. For e.g.
user#>pwd
/home/joenull
user#>nodehandler -k ~/Ruby-Scripts/orbit-test
The experimenter can also move to where the script resides and execute it (without giving the full path) since nodehandler will look for the script in the current directory.
More information on writing experiment scripts can be found in the Tutorial.
Analyzing Results
Orbit provides a sophisticated framework to efficiently collect measurements at runtime into a database. This database is accessible to the experimenter during the experiment from the console. At the end of an experiment, the database is copied to an external machine and is accessible without a reservation. More information can be found here.
Where to go from here
If you are still unsure what Orbit is, please read the FAQ and the Tutorial, otherwise go ahead and register.
Attachments (5)
- Schedule-howto3.jpg (128.8 KB ) - added by 13 years ago.
- Schedule-howto4.jpg (56.7 KB ) - added by 13 years ago.
- Schedule-howto5.jpg (49.3 KB ) - added by 13 years ago.
- Schedule-HowTo6.jpg (66.6 KB ) - added by 13 years ago.
-
Result.png
(284.5 KB
) - added by 11 years ago.
Demo result pae
Download all attachments as: .zip