
| Version 20 (modified by , 12 years ago) ( diff ) |
|---|
WiMAX Tutorial 1: Basic Operations
Table of Contents
Prerequisites
This tutorial series assumes you have an ORBIT account, have scheduled a session on the ORBIT test bed, are familiar with SSH'ing into the test bed itself, and are familiar with the basics of running ORBIT experiments. If you have not done these things yet, you may wish to do so before taking a look at this slightly more advanced experiment. If you are unfamiliar with or are entirely new to ORBIT, you may wish to start here.
Difficulty
This tutorial requires only basic knowledge of Unix commands, SSH, WiMAX, and ORBIT.
Experiment: Successfully Image and Ping Nodes
Getting Started
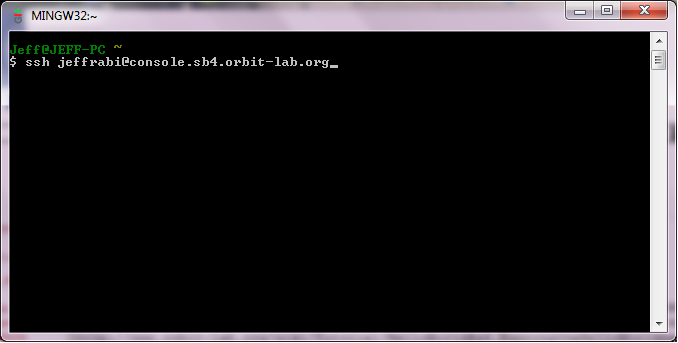
First, SSH into the test bed you plan on using for the experiment. For this experiment, we use ORBIT's Sandbox 4.
ssh <your_username>@console.sb4.orbit-lab.org

About the Base Station
WiMAX (related to and derived from WiFi) works by sending all data traffic through an Access Point called a Base Station. This is similar to how a cell phone connects to a cell tower. In fact, at one point WiMAX was used to provide mobile internet connectivity to cell phones! However, the WiMAX base station at WINLAB is special in that its operation settings can be changed to meet the needs of an experiment. This is good, because it permits tweaking of settings to conduct research. However, it also means that latest person to run experiments may have left the base station with settings that will make conducting experiments difficult. First, tell the base station to use default settings, and then reset it.
Interacting with the Base Station
The base station receives instructions from http get requests sent from the corresponding sandbox. For example, consider
wget -qO- http://cons-wm-01:5052/wimaxrf/datapath/config/load?name=defaults
"wget" is the command to send an http request; "-qO-" gives options for outputting the result of the request to the screen; "cons-wm-01" is the name of the base station; "5052" is the port number; "/wimaxrf/datapath/config/load" selects the subsetting "load" from the path; "?" demarcates instructions; "name=defaults" assigns "defaults" to the property "name".
Restoring the Base Station to Defaults
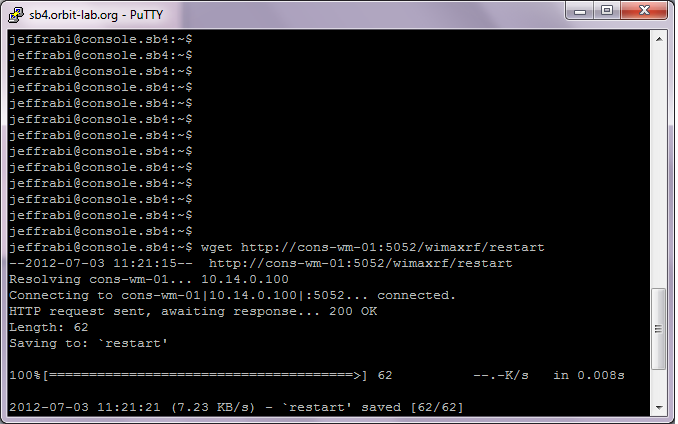
To restore the base station to defaults, run the following commands:
wget -qO- http://cons-wm-01:5052/wimaxrf/defaults
wget http://cons-wm-01:5052/wimaxrf/restart
After issuing the restart command, the base station will be unavailable for 2 minutes. Do not be alarmed if the base station returns what appears to be the following error message:
Failed: 'Exception in snmp_set 'host 10.3.0.3 not responding''
This is normal. It simply means that the base station has gone offline (while rebooting).

Loading a Default Image
Much like it is recommended to reset the base station to default settings, it is also recommended to load up a "clean" disk image. This helps avoid conflicts with previous user settings. It can also save time manually setting up frequently-used properties.
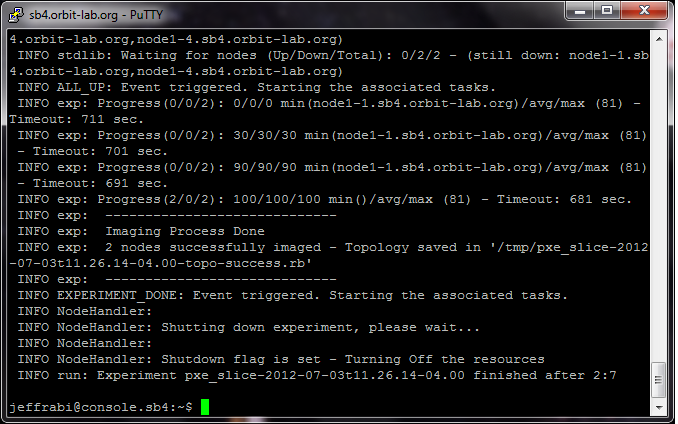
omf-5.3 load -i wmx-tutorial.ndz -t node1-1.sb4.orbit-lab.org,node1-4.sb4.orbit-lab.org
You should assume that this command is whitespace-sensitive.


This process may take a few minutes. When it is complete, confirm the installation by SSH'ing into the nodes and checking that the settings loaded correctly.
Manually Confirming Settings
SSH into the nodes, one at a time, to confirm that the settings loaded correctly.
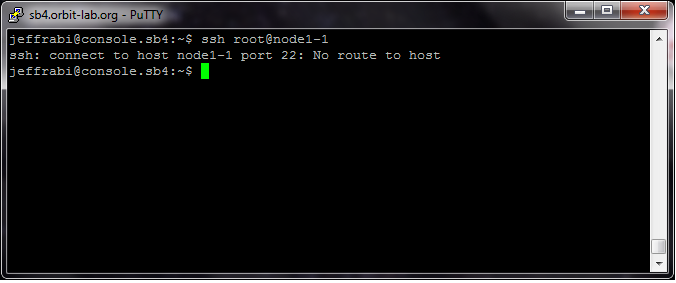
ssh root@node1-1
If this works, proceed to the next section. If not, here is some error-checking advice.
If you receive an error message like the one below, it may mean that your node is off after the imaging process. If so, you should turn it on.

Sometimes nodes also 'hiccup' after imaging, and will deny connections. This can be worked around by turning the affected nodes off and back on.
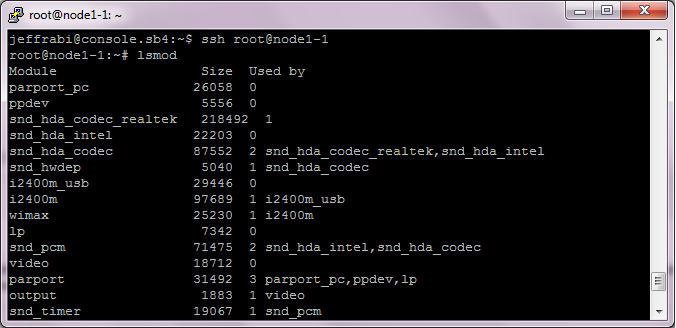
Check that the drivers loaded correctly using the lsmod command. The WiMAX drivers on this testbed are of the i2400 family.
lsmod
lsmod | grep i2400m_usb


If they aren't loaded, put them up manually:
modprobe i2400m_usb
Connect to the WiMAX Network
Next, use the WiMAX Configuration Utility (wimaxcu) to connect to the WiMAX network:
wimaxcu ron
wimaxcu connect network 51

Assign an IP Address
By this point, the drivers are loaded, and the network is connected. However, the WiMAX card hasn't been given an IP address yet. Below is the recommended IP address for node 1 on sandbox 4. (Alternate IP addresses are allowed, but require additional configuration at other stages of an experiment.)
ifconfig
ifconfig wmx0 10.41.14.1 netmask 255.255.0.0 up
ifconfig

Note that the wmx0 network card now has an IP address.
Repeat for Other Nodes
For the sake of brevity, we will not repeat the previous process at length for the other nodes. However, we will give sample instructions for node 4, and elaborate on some general rules.
ssh root@node1-4 # will take to another screen
lsmod | grep i2400
modprobe i2400m_usb # only if needed
wimaxcu ron
wimaxcu connect network 51
ifconfig wmx0 10.41.14.4 netmask 255.255.0.0 up
ifconfig Recommended Settings
For most of the sandboxes on ORBIT, the rule of thumb for assigning IP addresses is:
10.41.1X.Y
Where 10.41 is the hostname, X is the sandbox number, and Y is the node number.
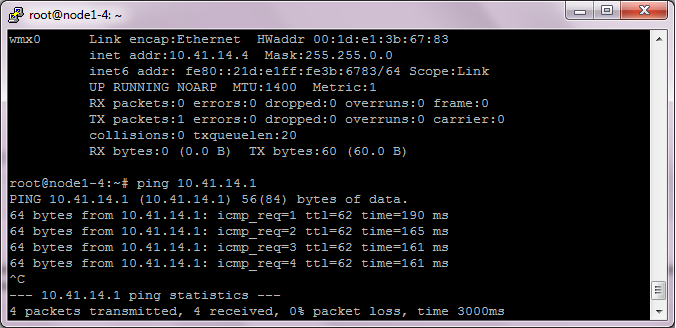
Testing Connection
Repeat the previous steps for other nodes. To test the connection between two nodes, use the ping utility, which sends packets at an IP address and checks for confirmation of receipt. Assuming that nodes 1 and 4 have already been connected:
ssh root@node1-1
ping 10.41.14.4

Continuing Onwards
Attachments (11)
-
ssh.png
(49.6 KB
) - added by 12 years ago.
SSH into sandbox 4
-
failconnect.png
(48.8 KB
) - added by 12 years ago.
Failure to SSH Node
-
reset.png
(73.6 KB
) - added by 12 years ago.
Reset the Base Station
-
restart.png
(46.1 KB
) - added by 12 years ago.
Restart the Base Station
-
pxe1.png
(77.6 KB
) - added by 12 years ago.
Image the Node
-
pxe2.png
(76.4 KB
) - added by 12 years ago.
Image the Node
-
lsmod.png
(38.4 KB
) - added by 12 years ago.
lsmod
-
lsmodgrep.png
(31.0 KB
) - added by 12 years ago.
Filter lsmod
-
wimaxcu.png
(33.1 KB
) - added by 12 years ago.
wimaxcu
-
ifconfig.png
(41.7 KB
) - added by 12 years ago.
ifconfig wmx0
-
ping.png
(42.0 KB
) - added by 12 years ago.
ping
Download all attachments as: .zip